BDL4550D - Firmware Update and Fusion Quick Install from Clone File
Requirements
- USB flash drive in FAT32 format (preferably 16 GB)
Files to download
- Latest firmware (v FB02.28): https://westanonline.sharepoint.com/:f:/s/Support/EqDGdRhBpnxZja8hfVftqwkBi_QdbCa8yEFtVUqdqfYAsw?e=U7sX8O
- Clone file: https://westanonline.sharepoint.com/:f:/s/Support/EkiW9yoToCJNoCU4c_GkMpgBF1yEUr8vbkJ47QO4KyRETQ?e=tbGEKR
(The clone file contains Fusion app v2.4.0 and the following customised settings: Time zone = Sydney/Canberra; Power save = Mode 4; Boot on source, Input = Custom; Android Source settings, Custom app = Fusion)
Preparation
- Copy the following to the root directory of the USB flash drive:
- The downloaded update.zip firmware file. ***Do not unzip the file.***
- The philips folder from the unzipped Clone.zip file.
Steps
- Turn on the screen and plug in the USB.
- During the initial setup process, connect the screen to the Internet. You may skip through other setup stages.
- When CMND & Deploy popup message comes up, select Deny and press OK.

- Plug in the USB drive.
- Press the following remote control button sequence to check the firmware version: INFO, 7, 7
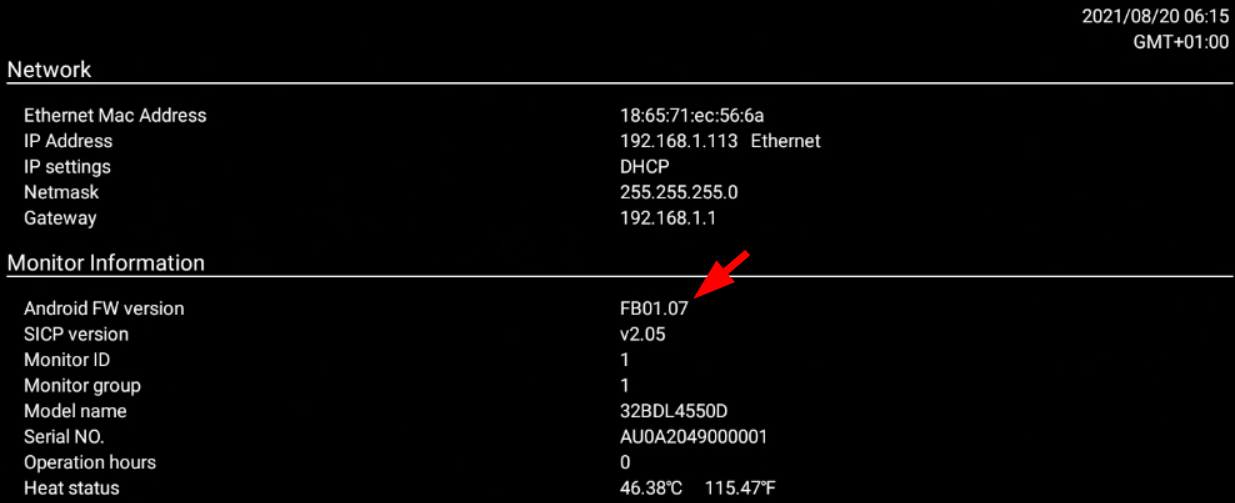
- If the screen already has the latest firmware, skip to step 11.
- Press the following remote button sequence to access the Android menu: HOME, 1, 8, 8, 8
- Navigate to Settings ⇾ Signage Display ⇾ System updates ⇾ Local update and press OK.
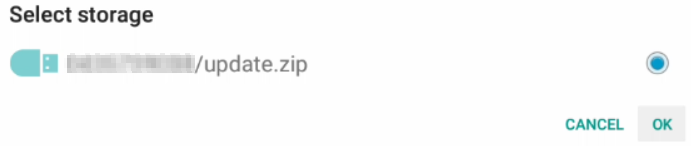
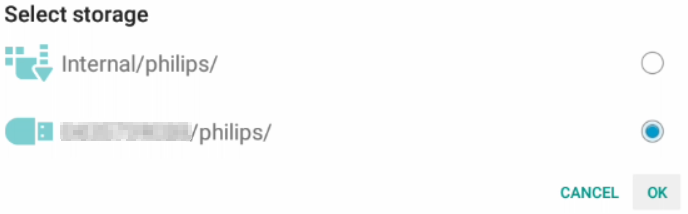
- Select the USB drive and press OK to initiate the firmware update process. Upon completion, the screen will go into Standby mode.
- Power off the screen from the wall (or the rocker switch at the back of the screen) and power it on again.
- Press the following remote button sequence to access the Android menu: HOME, 1, 8, 8, 8
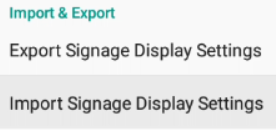
- Navigate to Settings ⇾ Signage Display ⇾ System tools ⇾ Import & Export: Import Signage Display Settings and press OK.
- Select the USB drive and press OK to initiate the cloning process. Upon completion, the screen will restart with Fusion app autoloading.
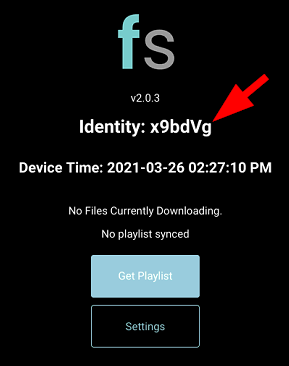
- Note down the Fusion Identity code and register it by logging into your Fusion account at https://app.fusionsignage.com.au/login